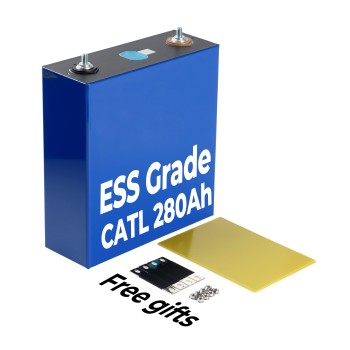
Imagine this: You’ve spent hours picking out LiFePO4 cells for your off-grid solar dream. The cells are top-notch, the wiring’s pristine, and you’re already picturing free energy at your cabin. Then, a cheap, mismatched Battery Management System (BMS) turns it all into a smoking mess. Frustrating, huh? If you’re wondering how to choose a BMS for LiFePO4 cells, you’re in the right place. A BMS isn’t just some tech add-on—it’s the brain keeping your battery safe, balanced, and humming along. Get it wrong, and you’re risking safety, performance, or your hard-earned cash. The good news? It’s simpler than it sounds. In this beginner-friendly guide, we’ll walk you through everything you need to pick the perfect BMS for your LiFePO4 cells—step by step, no engineering degree required. Let’s get started!
Why LiFePO4 Cells Need a BMS
LiFePO4 cells are the superheroes of batteries—tough, eco-friendly, and built to last thousands of cycles. But even superheroes need a sidekick, and that’s where the BMS shines. Think of it as your car’s dashboard: it watches everything and warns you before the engine—or your battery—blows. So, why do LiFePO4 cells need this sidekick?
First, safety. These cells are stable, but overcharging past 3.65V or draining below 2.5V can still cause problems—think swollen cells or, in extreme cases, a fire hazard, as the National Fire Protection Association warns with lithium-ion batteries. A BMS cuts power before disaster strikes. Second, balance. In a pack, cells don’t always charge evenly—one might hog the juice while another lags. A BMS keeps them in sync, like a conductor tuning a band. Finally, lifespan. Why spend $500 on premium cells only to burn them out early? A good BMS boosts efficiency and longevity, saving you money over time.
Types of BMS—Which One’s Right for You?
Not all BMS units are the same, and picking the right type is half the fun. Let’s meet the main players and match one to your style—like choosing a pet for your battery pack.
- Passive BMS: This is the low-maintenance goldfish. Affordable and simple, it balances cells by bleeding off excess energy as heat. It’s not the most efficient, but it’s perfect for small budgets or basic builds—like a 12V RV battery. If you’re pinching pennies, this might be your match.
- Active BMS: Say hello to the needy but brilliant border collie. Pricier and high-tech, it redistributes energy between cells instead of wasting it, keeping your pack in peak shape. It’s the luxury spa treatment for LiFePO4—ideal for big solar banks or electric vehicles where every watt matters.
- Wired vs. Bluetooth: Old-school wired BMS units are reliable and no-fuss, while Bluetooth ones let you monitor stats from an app. Imagine checking your battery’s health from the couch—pretty cool, right? Bluetooth wins for DIY solar geeks; wired is fine for set-it-and-forget-it projects.
So, what’s your pick? A passive, wired BMS for a budget camper? Or an active Bluetooth unit for a solar powerhouse? It’s all about what fits your project—and your wallet.
Key Features to Look for in a BMS
Shopping for a BMS can feel like a maze, but it doesn’t have to. Here’s your must-have checklist to cut through the noise and find a gem. Think of it like picking a phone—focus on the specs that count.
- Current Rating: This is your power highway. If your setup pulls 100A (like a beefy inverter), a 60A BMS will choke and fry. Match it to your max load—add a 20% buffer if you can.
- Cell Count (e.g., 4S, 8S): Your BMS must align with your series setup—4S for 12V, 8S for 24V. Get this wrong, and it’s like pouring diesel in a gas car—total chaos. Count your cells first.
- Balancing Current: This is how fast it evens out your cells. A 50mA balancer is slow and steady; 1A is a speed demon. For big packs or heavy use, higher is better—think pro vs. rookie.
- Temperature Sensors: LiFePO4 cells hate extremes. Sensors shut things down before your battery turns into a summer BBQ or a winter popsicle. A must for wild climates.
- Low-Voltage Cutoff: Your safety net. It stops the battery from draining below 2.5V per cell, preventing permanent damage. Non-negotiable for peace of mind.
Want to dig deeper? Check out our guide on maximizing LiFePO4 battery life for tips to keep your setup thriving. For now, keep this checklist handy—you’re almost there!

Common Mistakes to Avoid
Don’t learn the hard way—here’s what trips up even seasoned DIYers when choosing a BMS for LiFePO4 cells. Skip these traps, and you’ll save time, money, and a lot of swearing.
- Undersizing the BMS: I once saw a guy on X brag about his $20, 60A BMS—until it smoked his 100A LiFePO4 pack. Ouch. Skimping on current rating is like using a straw for a firehose—it won’t end well. Size up or regret it.
- Ignoring Cell Balance: Unbalanced cells are a ticking time bomb. One overcharges, another dies, and your pack’s toast. A BMS with weak balancing—or none—is a gamble not worth taking. Check that spec.
- Skipping Temperature Protection: Ever left a phone in a hot car? Same deal here. No sensors mean no warning when your cells hit meltdown mode. I’ve heard of garage builds turning into science experiments—don’t join the club.
- Overlooking Wiring: A great BMS is useless if you botch the install. Loose connections or wrong wires can fry your system fast. Double-check the manual—trust me.
Avoid these, and you’re golden. A little care now beats a big headache later.
How to Match a BMS to Your Project
Your BMS isn’t one-size-fits-all—it’s got to fit your project like a glove. Here’s how to nail it in three easy steps.
- Calculate Your Max Current: Divide your device’s wattage by your battery voltage. A 1200W inverter on a 12V pack? That’s 100A (1200 ÷ 12). Grab a BMS rated for at least that—120A for wiggle room. Simple math, big win.
- Count Your Cells: How many in series (S) and parallel (P)? A 12V setup is usually 4S; 24V is 8S. Parallel boosts capacity but doesn’t change the BMS count—just focus on the “S.” Mismatch this, and nothing works.
- Pick Your Extras: Bluetooth for app control? Active balancing for efficiency? Match it to your needs. A 12V solar bank? Try a 4S, 100A BMS with Bluetooth—simple and smart. Budget camper? A passive 60A might do.
Picture this: You’re powering an off-grid cabin with a 24V, 2000W system. That’s 8S, 83A—round up to a 100A BMS with temp sensors (cabins get cold!). Get it right, and your LiFePO4 pack will hum for years.
Power Up with the Docan JK B2A24S20P 200A BMS
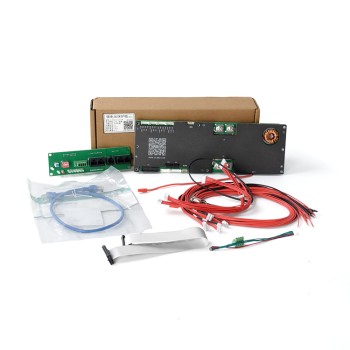
The Docan JK B2A24S20P 200A BMS with Bluetooth and 2A Active Balancer is a top choice for your LiFePO4 solar battery projects, supporting 7S-24S configurations. With a robust 200A continuous current rating, it effortlessly powers high-demand systems like 2400W inverters or RV setups, while its 2A active balancer ensures rapid cell balancing for optimal battery life and performance. Built-in safety features, including temperature sensors and a 2.5V per-cell low-voltage cutoff, protect your battery from damage. Bluetooth connectivity via the JK app provides real-time monitoring of voltage, temperature, and balance, making it a favorite for DIYers and professionals alike. Ready to enhance your solar setup? Check it out.
Conclusion
Choosing a BMS for your LiFePO4 cells doesn’t have to be a tech nightmare. Match the current, check the features, and dodge the rookie mistakes—it’s that easy. Whether you’re building a solar beast or a weekend camper battery, the right BMS keeps your cells safe, balanced, and ready to roll. So, what’s next? Grab your checklist, size up your project, and pick a BMS that fits. You’ll save headaches (and cash) down the line.


Leave a Comment